The motherboard of champions, the top of the line selection for enthusiasts and overclockers is finally here. This is the ASUS ROG Maximus Z790 Apex, recently launched with the new Intel 13th generation of processors. Asus always delivers an APEX motherboard with each new chipset release, tailored to enthusiasts seeking to maximize their processor and DDR5 memory performance. The APEX motherboards feature advanced power delivery and cooling systems, as well as other functionalities optimized for overclocking and fine-tuning performance.
First Look
This new variant breaks the past conventional mould of ASUS colour theme for the APEX lineup. ASUS chose to move away from the previous black and red colourway by opting to go for a more brave new look with a dark scheme. Moving on, as this is also the fifteenth version of Apex, ASUS has dropped the Roman numbering scheme and just straight up gone with the chipset being part of the name. Goodbye keeping track of editions henceforth.
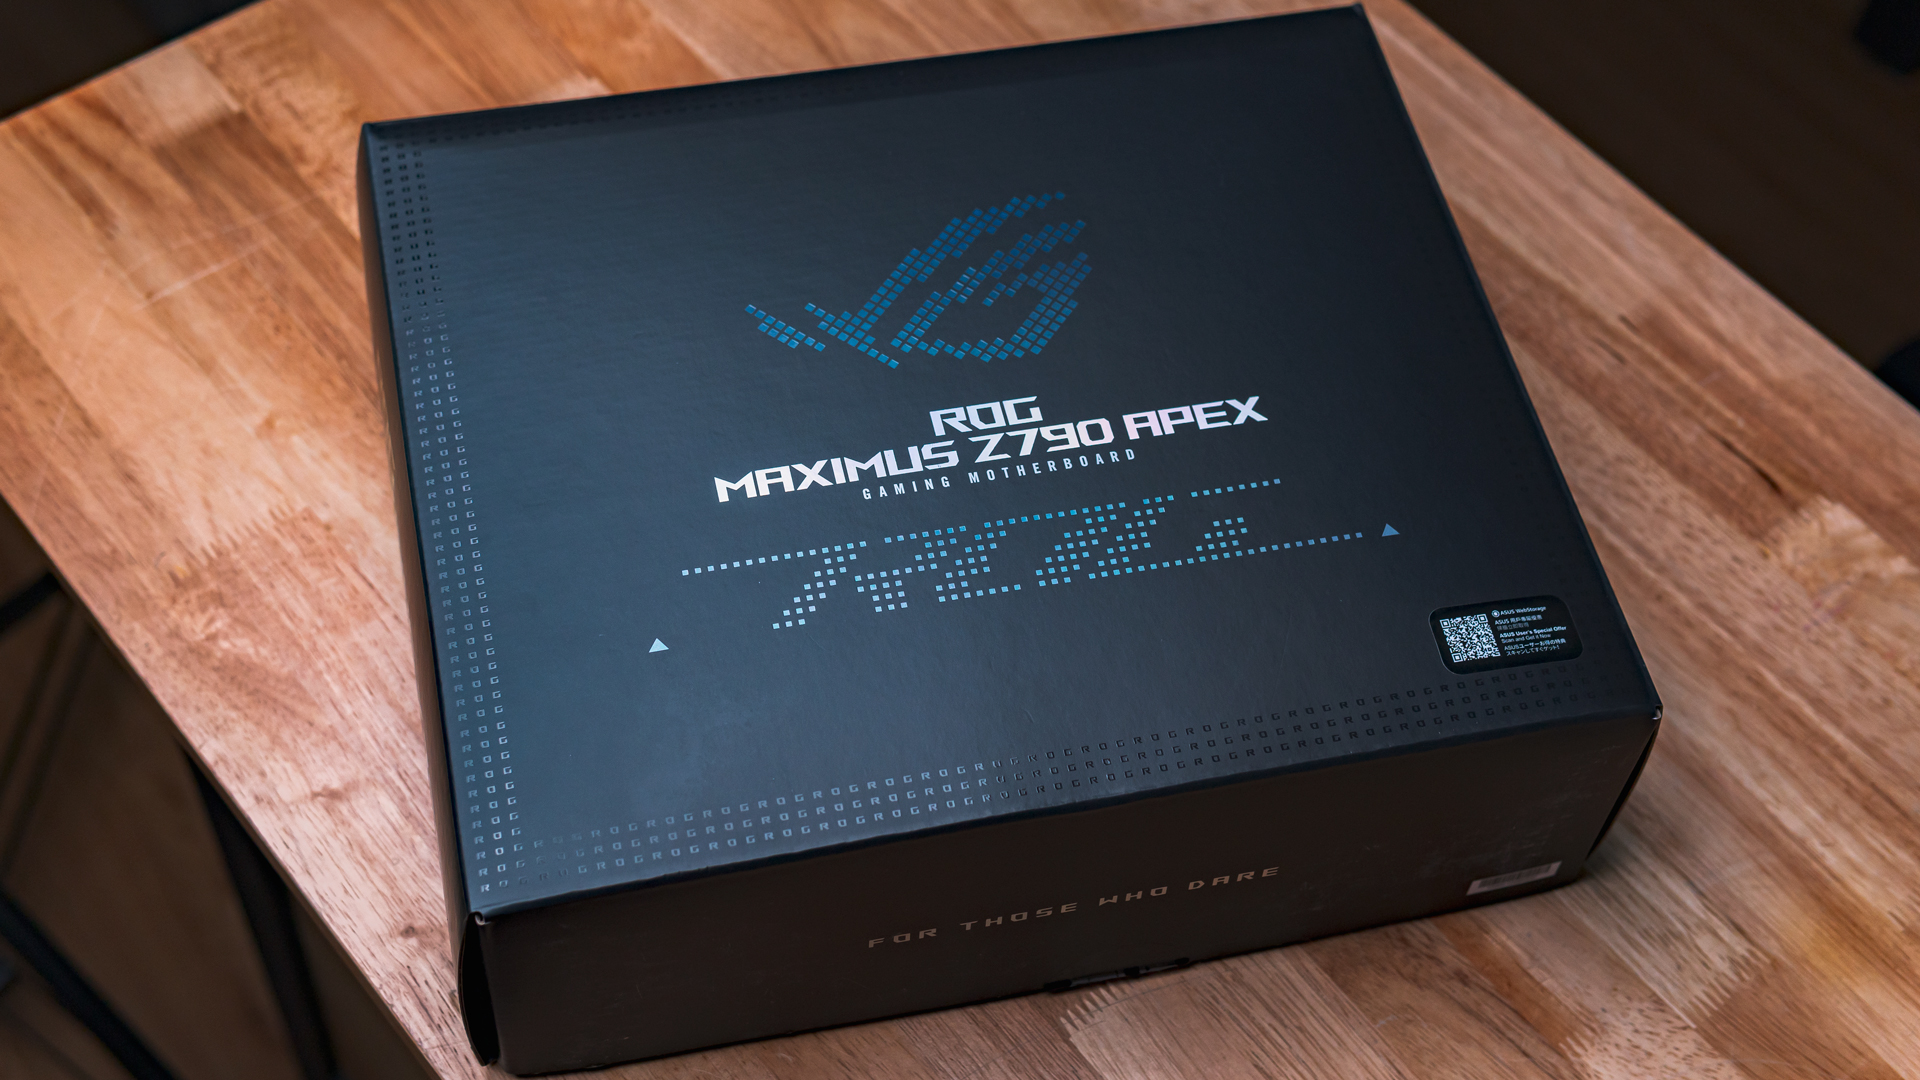
The packaging comes in a black box with just the ASUS ROG Maximus Z790 Apex printed in chrome finishing on the box. For this reason, I love how simple and minimalistic it looks as there is practically nothing much going on with the packaging. Moving on, the motherboard comes in a pretty decent set of accessories and somewhat generic. We get the usual SATA cables, M.2 screws and the Maximus/Crosshair exclusive DIMM.2 storage drive for NVMES. Not to mention, ASUS also has included a PCIE M.2 card that grants users another extra slot for M.2 NVME Gen 5 drives.
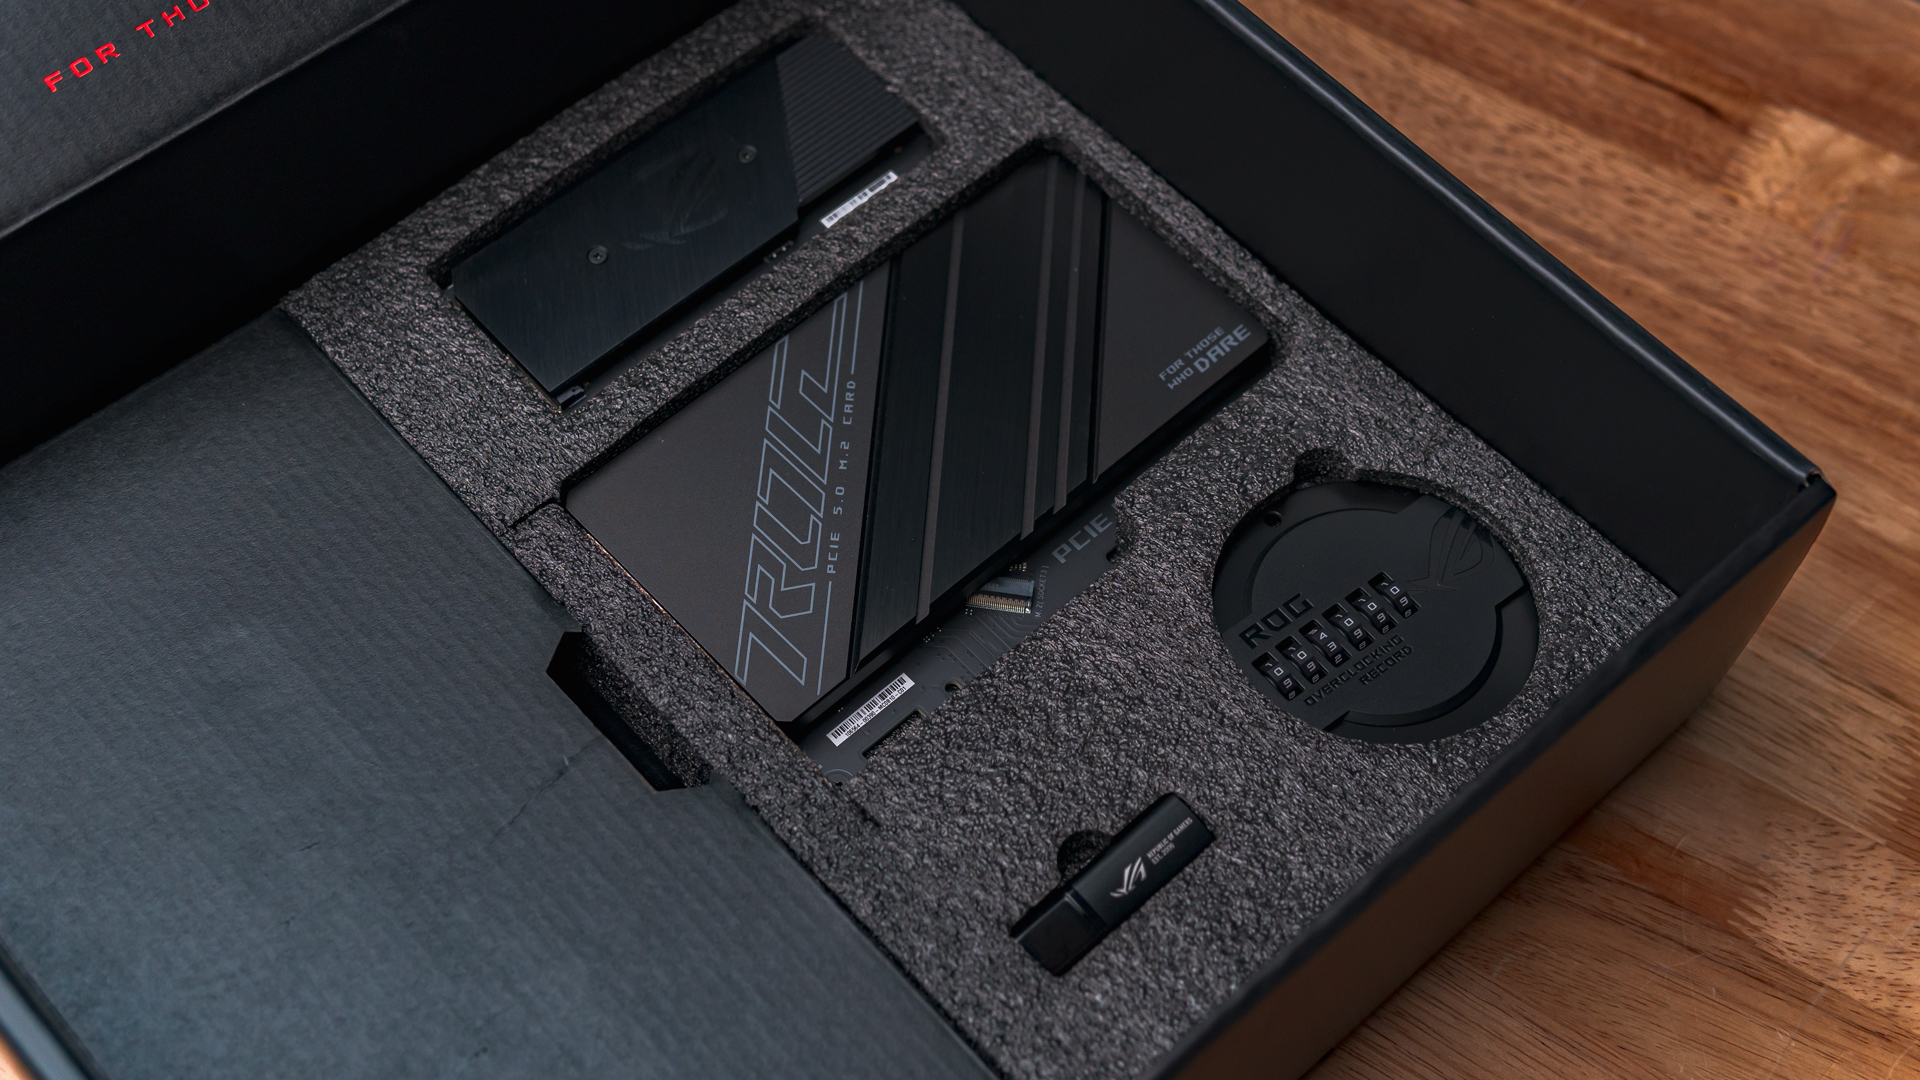
However, ASUS has added a new accessory to this lineup – the ROG Overclocking Medal. This piece of a decoration can be used to display any achieved clock speed for your processor or ram, as shown in the image below.
Technical Specifications
| Socket | LGA1700 |
| Chipset | Z790 |
| Form Factor | ATX |
| Voltage Regulator | 24+2 (105A Power Stages) Renesas RAA22010504 MOSFETS/VRMs |
| Expansion Slots | 1 x PCIe 4.0 x4 slot 1 x PCIe 4.0 x1 slot |
| DIMM Slots | 2 x DIMM, Max. 96GB, DDR5 8000+(OC) |
| M.2 Sockets | M.2_1 slot (Key M), type 2242/2260/2280 (supports PCIe 4.0 x4 mode) |
| M.2_2 slot (Key M), type 2242/2260/2280 (supports PCIe 4.0 x4 & SATA modes) | |
| USB Headers | 1 x USB 3.2 Gen 2×2 connector (supports USB Type-C® ) |
| 2 x USB 3.2 Gen 1 headers support 4 additional USB 3.2 Gen 1 ports | |
| 2 x USB 2.0 headers support 4 additional USB 2.0 ports | |
| Fan/Pump Headers | (9) 4-Pin (CPU, CPU OPT, AIO, Chassis) |
| RGB Headers | (3) aRGB (3-pin) |
| (1) AURA RGB (4-pin) | |
| Diagnostics | 2 x BCLK button 1 x BIOS Switch button 1 x FlexKey button 1 x Front Panel Audio header (AAFP) 1 x LN2 Mode jumper 1 x Osc sense header 1 x Pause switch 12 x ProbeIt Measurement Points 1 x ReTry button 2 x RSVD switches 1 x RSVD header 1 x Safe Boot button 1 x Slow Mode switch 1 x Start button |
| ASUS Q-Design | – M.2 Q-Latch – PCIe Slot Q-Release – Q-Code – Q-Connector – Q-LED (CPU [red], DRAM [yellow], VGA [white], Boot Device [yellow green]) – Q-Slot |
| Bios | 2 x 256 Mb Flash ROM, UEFI AMI BIOS |
Diving Deep
The new Z790 Apex is an extreme of sorts. This being the case as the motherboard sports a very new brave front, appearing in the colours of white and metallic gray. The overall design is almost similar to the previous Z690 Apex but with a few exceptions here and there. For instance, ASUS has added more diagnostic features by introducing a new safe boot button, a FlexKey button that is programmable to any set function and a couple of more buttons which will be discussed in further detail below.

As extreme and fine as it gets, the 105A power stages(Renesas RAA22010504 MOSFETS/VRMs) are accompanied by a high permeability alloy core choke rated to handle 45A. The power stages are of teamed configuration. As to which it is essentially a 12 phase board with 2 VRMs each working in parallel. ASUS has achieved this without the use of doublers like some other manufacturers would do.
On the other hand, the motherboard does not come with native PCIE Gen 5 support for M.2 drives even when using the 2 slots on the DIMM.2 slot. For PCIE Gen 5 connectivity, users will have to plug in the PCIe 5.0 M.2 Card.

Additionally with it being a Z790 board, it comes with the LGA1700 socket and ASUS is still maintaining the dual cut outs for various cooler compatibility. Those who do not have a LGA1700 ready cooler can still afford to plug them in to cool their Intel 12th or 13th generation of processors.
Additionally the VRM heatsinks on the MOSFETs and chokes are connected by a heat pipe to further improve the cooling capacity by increasing its surface area for heat dissipation. There are a total of 4 heatsinks that provide ample of cooling capacities for the motherboard and can be found easily due to the metallic silver colourway of the heatsinks.
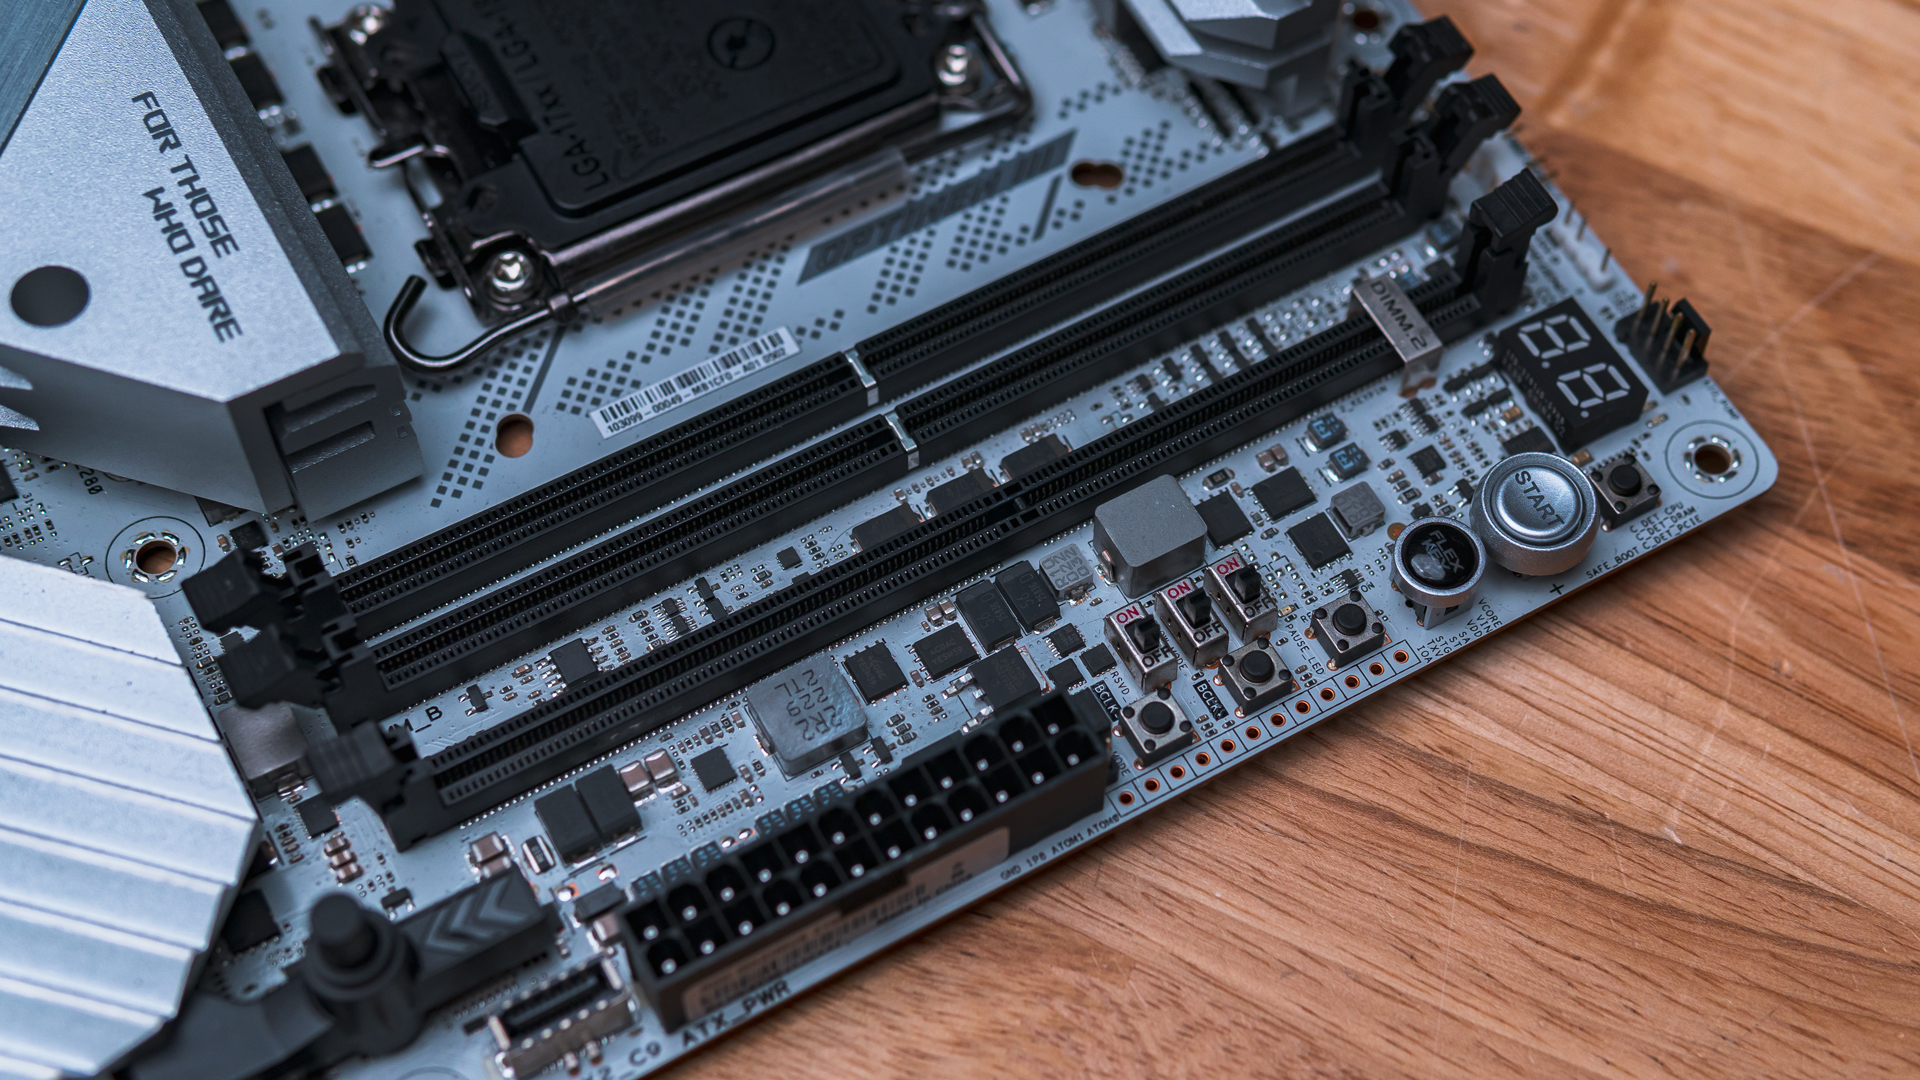
Furthermore, up top is where the bulk of the goodies are contained on this board. There are 2 DIMM slots for the DDR5 memory and a DIMM.2 slot. Bulk of the overclocking features, toggles and switches are located on the right of these slots. The FlexKey button, Start button, Safe Boot, Slow Mode, Retry, and many more are located on the top right zone. Consequently, this becomes the overclocking zone that most users would find themselves operating with frequently, so please make sure that this zone easily accessible.
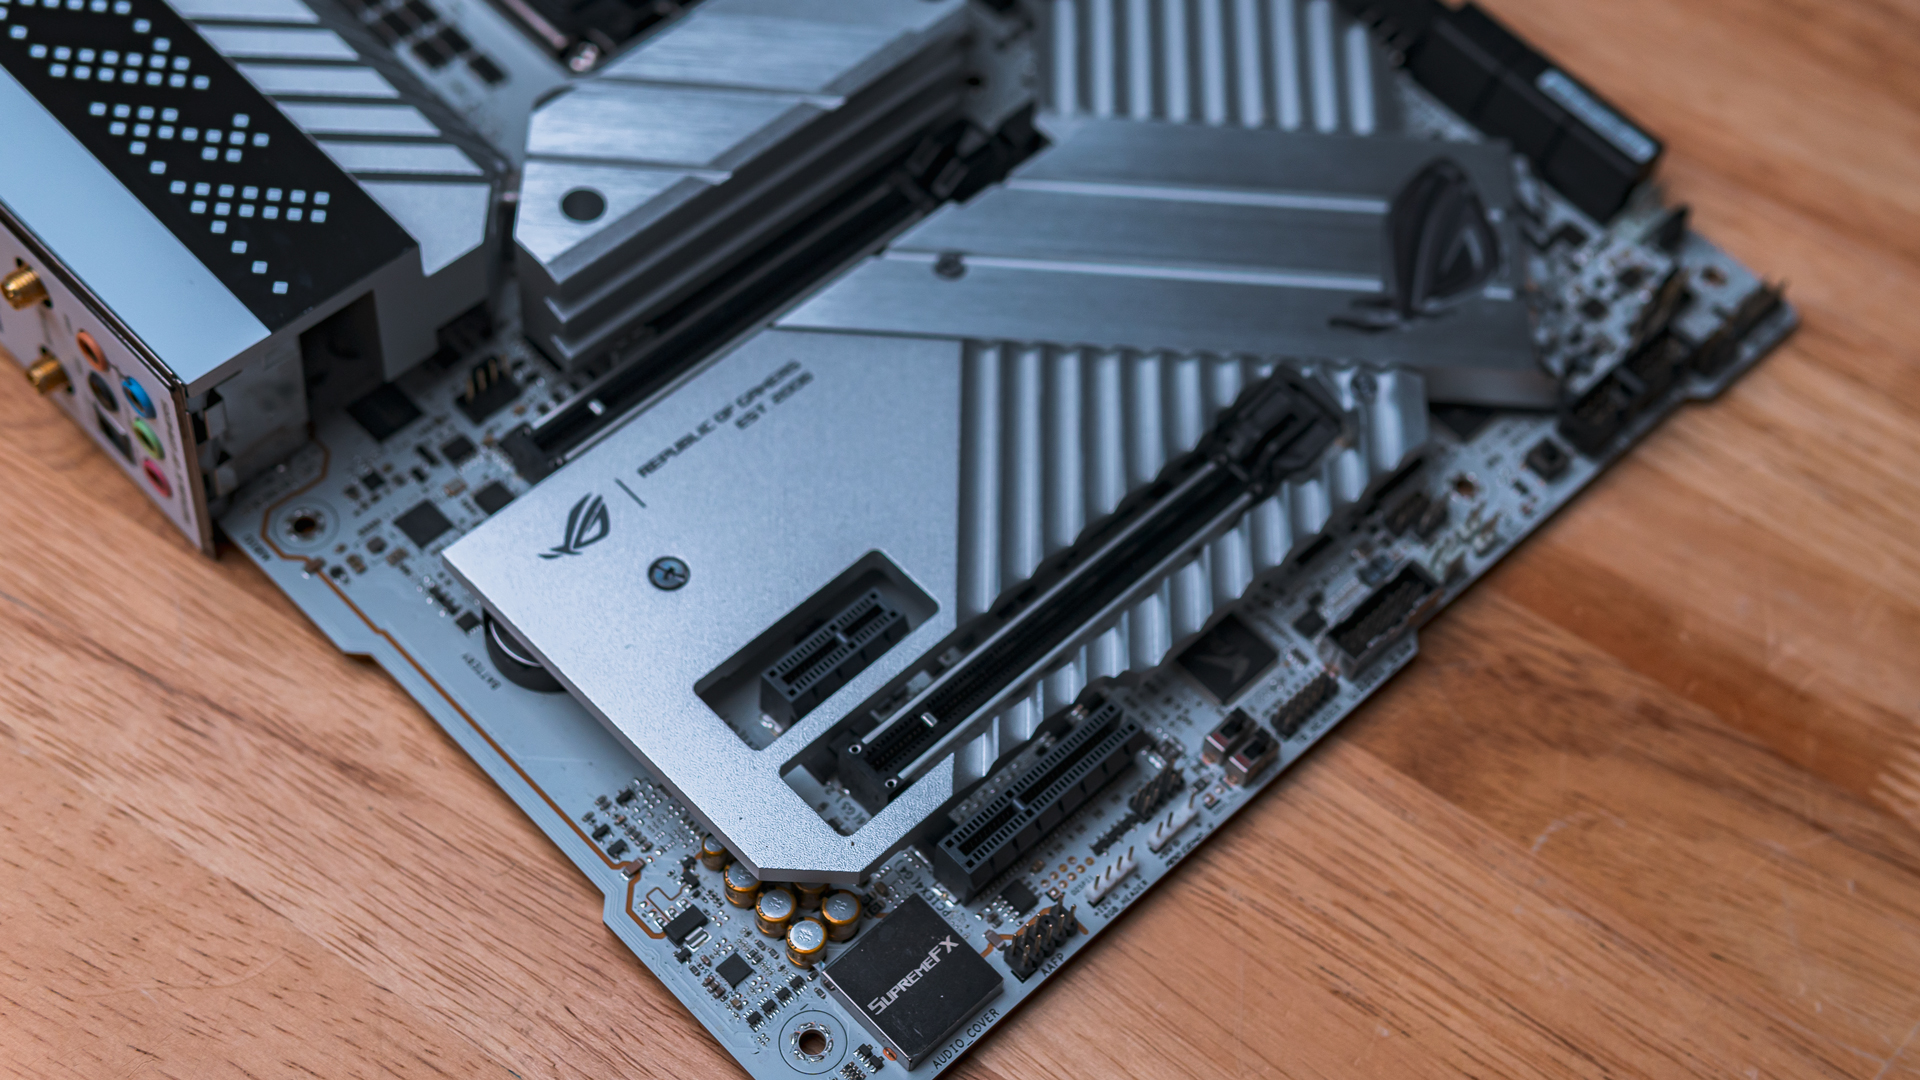
Undeniably, the standout feature is the PCIE Q Release button that makes it second appearance after seeing it in the Z690 Apex. For those who are wondering, the Q Release buttons enables users with beefy graphics card the easiest form of removing those cards. Positioned neatly below the 24pin ATX connector, with the simple push of a button, the first PCIE slot is disengaged and the card can be removed with no further hassle.
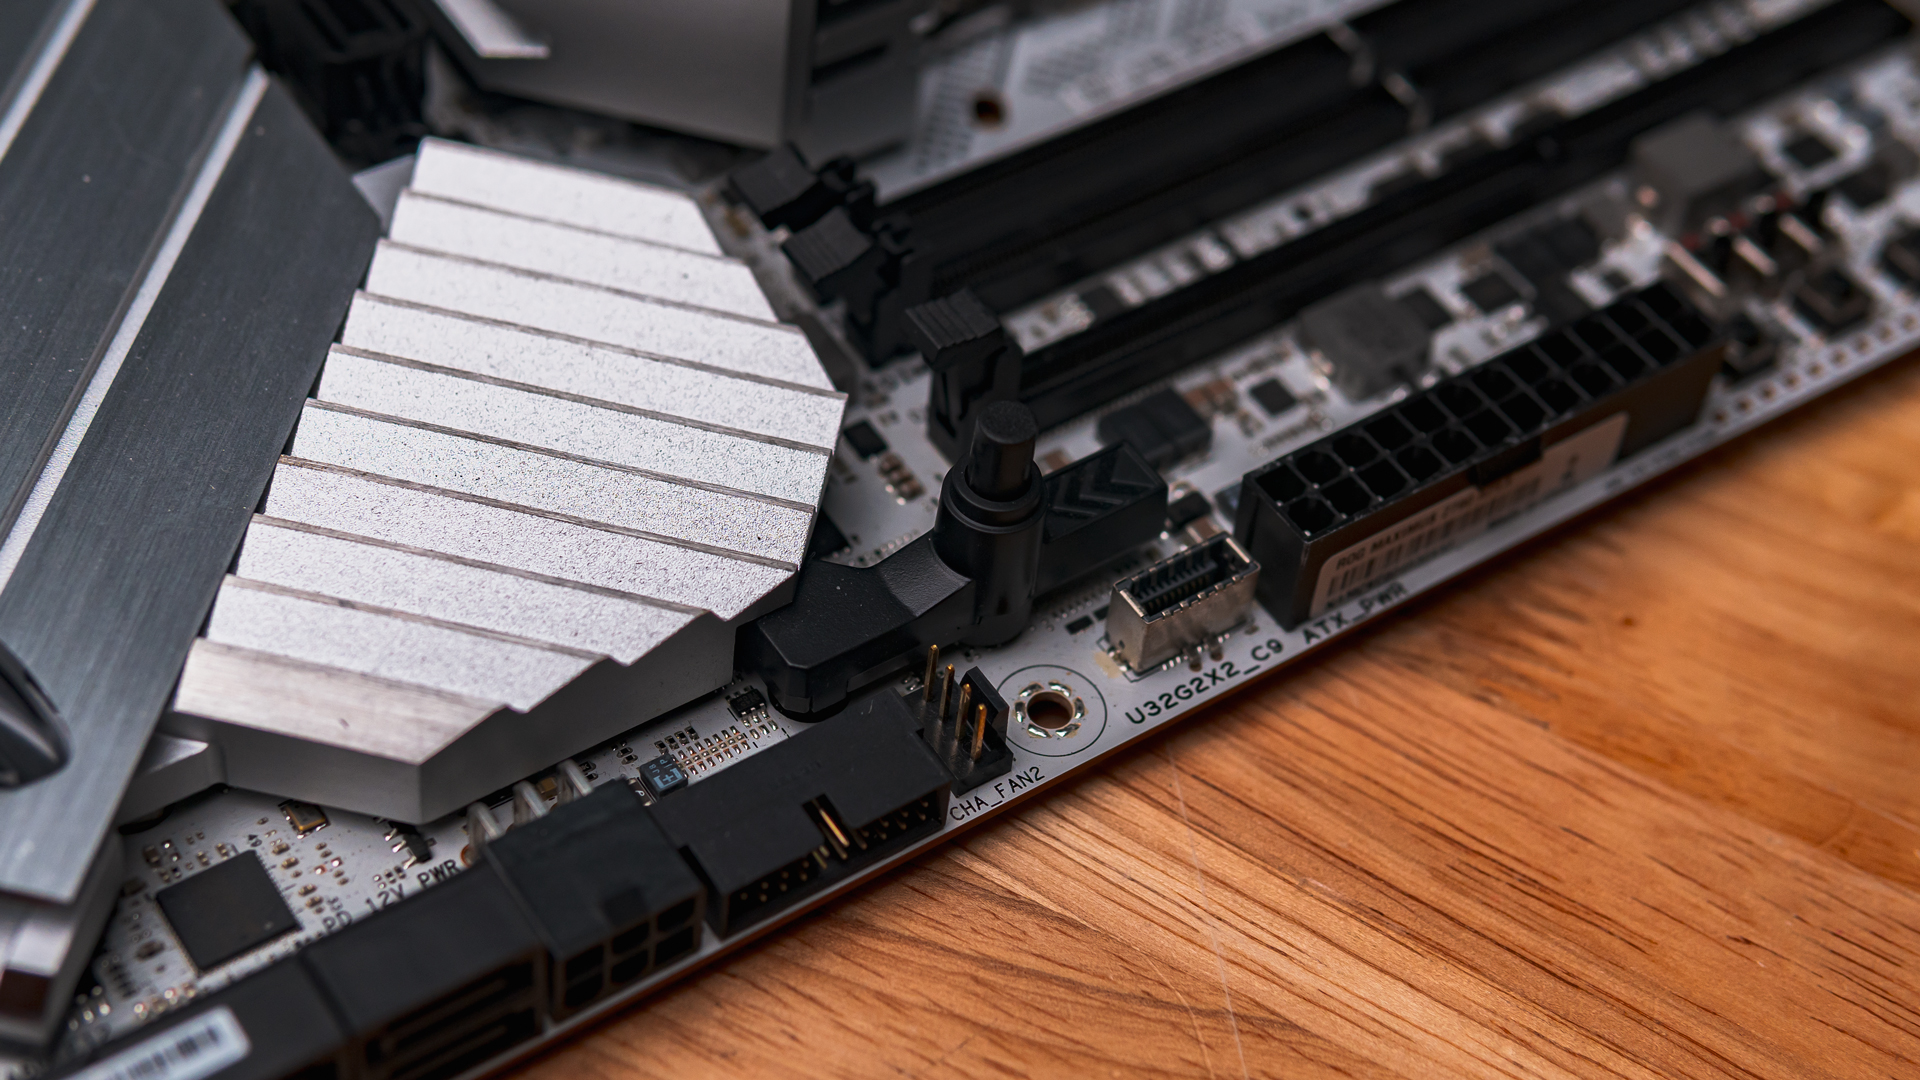
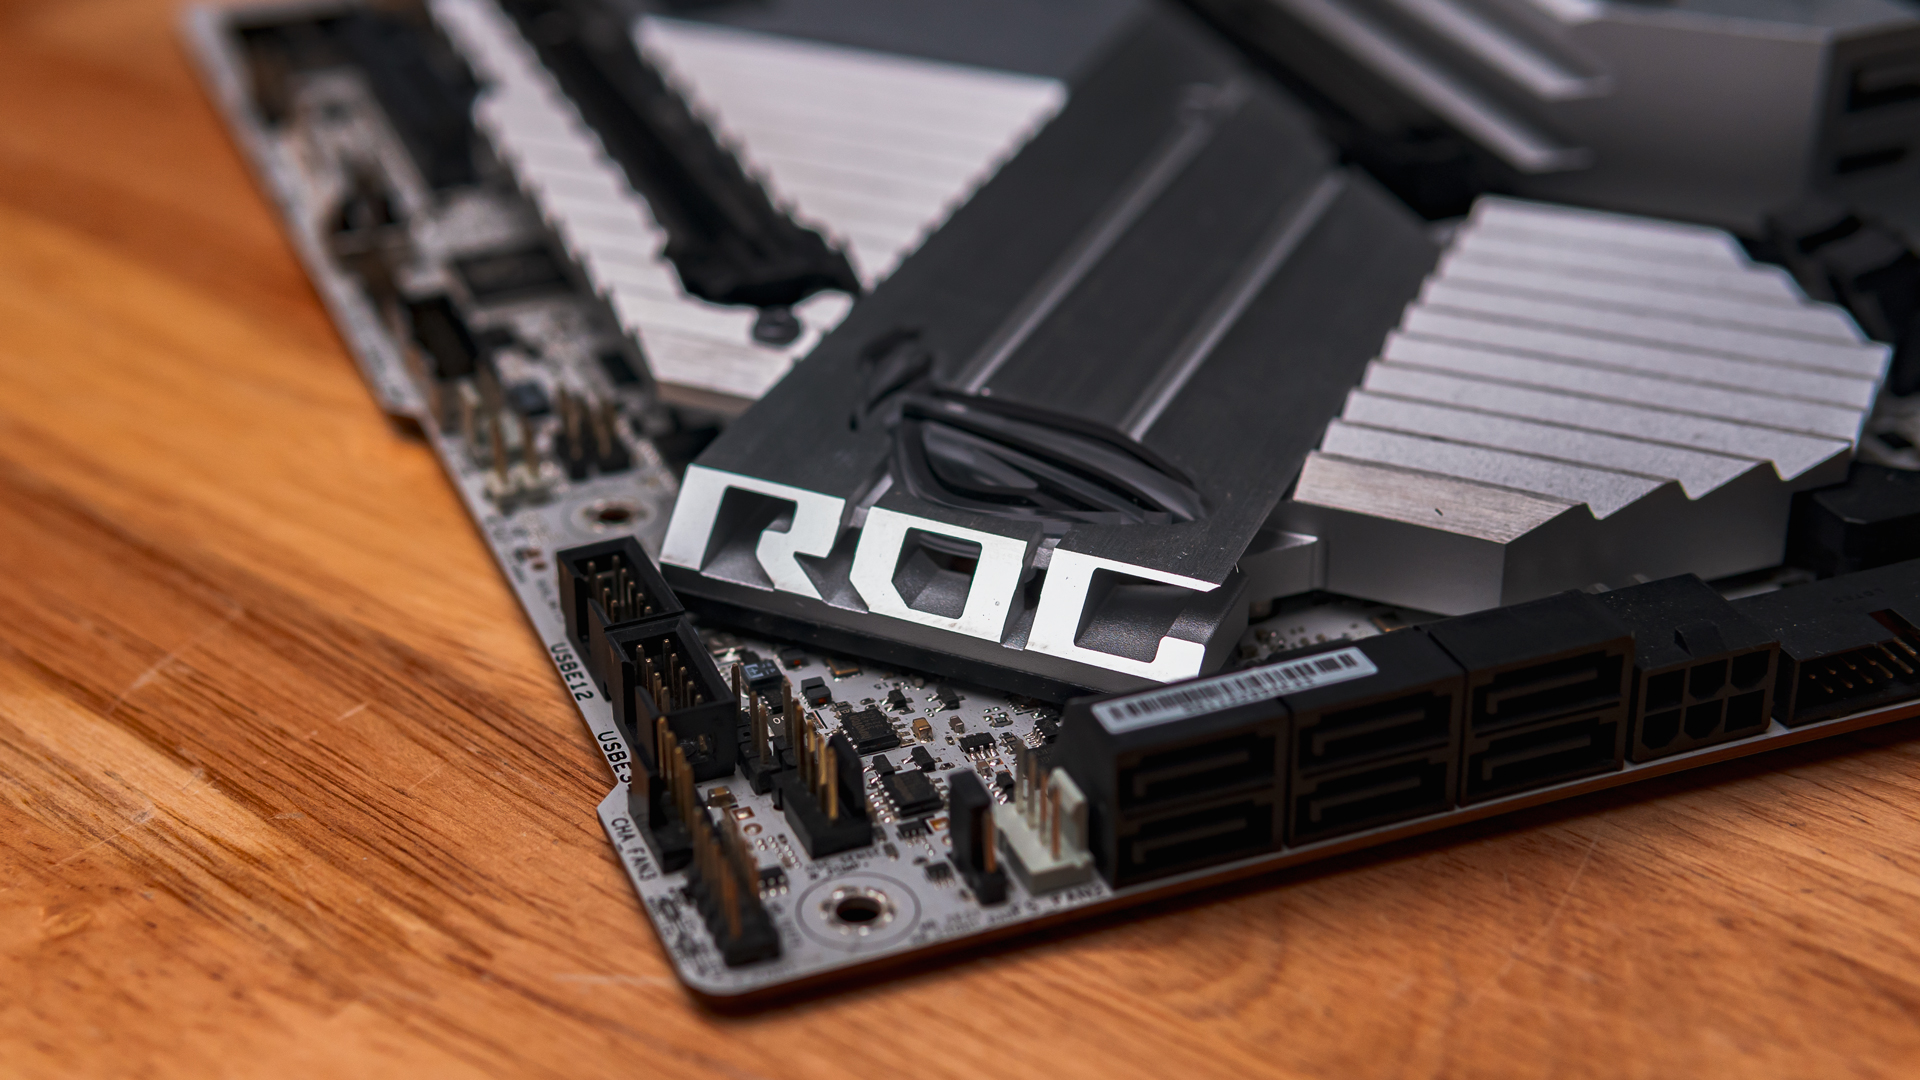
As for the onboard connectors and rear IO panel, it is the same and generic across most Maximus motherboards, so I will not go deep into that as there are plenty of USB slots, LN2 headers, PROBEIT headers, condensation zones, PWM connectors and etc. A design element I would like to highlight is the ROG stamp across the chipset heatsink, as it is most likely to be missed by the naked eye. This design gives the motherboard a rather unique look overall.
Overclocking Tools
Below are a list of toggles, switches and buttons that are found on the board and listed are also its individual functions.
- The Start button: Powers on the system
- The FlexKEY (reset) : Reset button however programmable in bios to any other designated function
- Safe Boot: Forces the board to restart without losing any previously saved settings in bios. This function boots directly into bios.
- ReTry Button : The ReTry button is specially designed for overclockers and is most useful during the booting process where the Reset button is rendered useless. Press this button to force the system to reboot while retaining the same settings to be retried in quick succession to achieve a successful POST.
- Switch bios : allows you to switch between the two bios.
- Slow Mode: The system may crash due to the CPU being unstable when using extreme overclocking settings. Enable the Slow Mode switch during LN2 benching to decrease the processor frequency and stabilize the system, allowing you to keep track of the overclocking data.
- LN2 Mode : allows to activate LN2 profiles in the bios.
- The debug LED: 4 diodes (CPU – DRAM – VGA – BOOT) which allows users to diagnose errors during the boot of the board. If one of them stays on, it means that the corresponding component has a problem.
- The Q-Led: allows to display a code corresponding to the component responsible for the error during the boot.
- The CMOS CLR: Resets the BIOS parameters in order to return to the default ones.
- ProbeIT : allows to measure voltages with a multimeter directly on the PCB.
BIOS
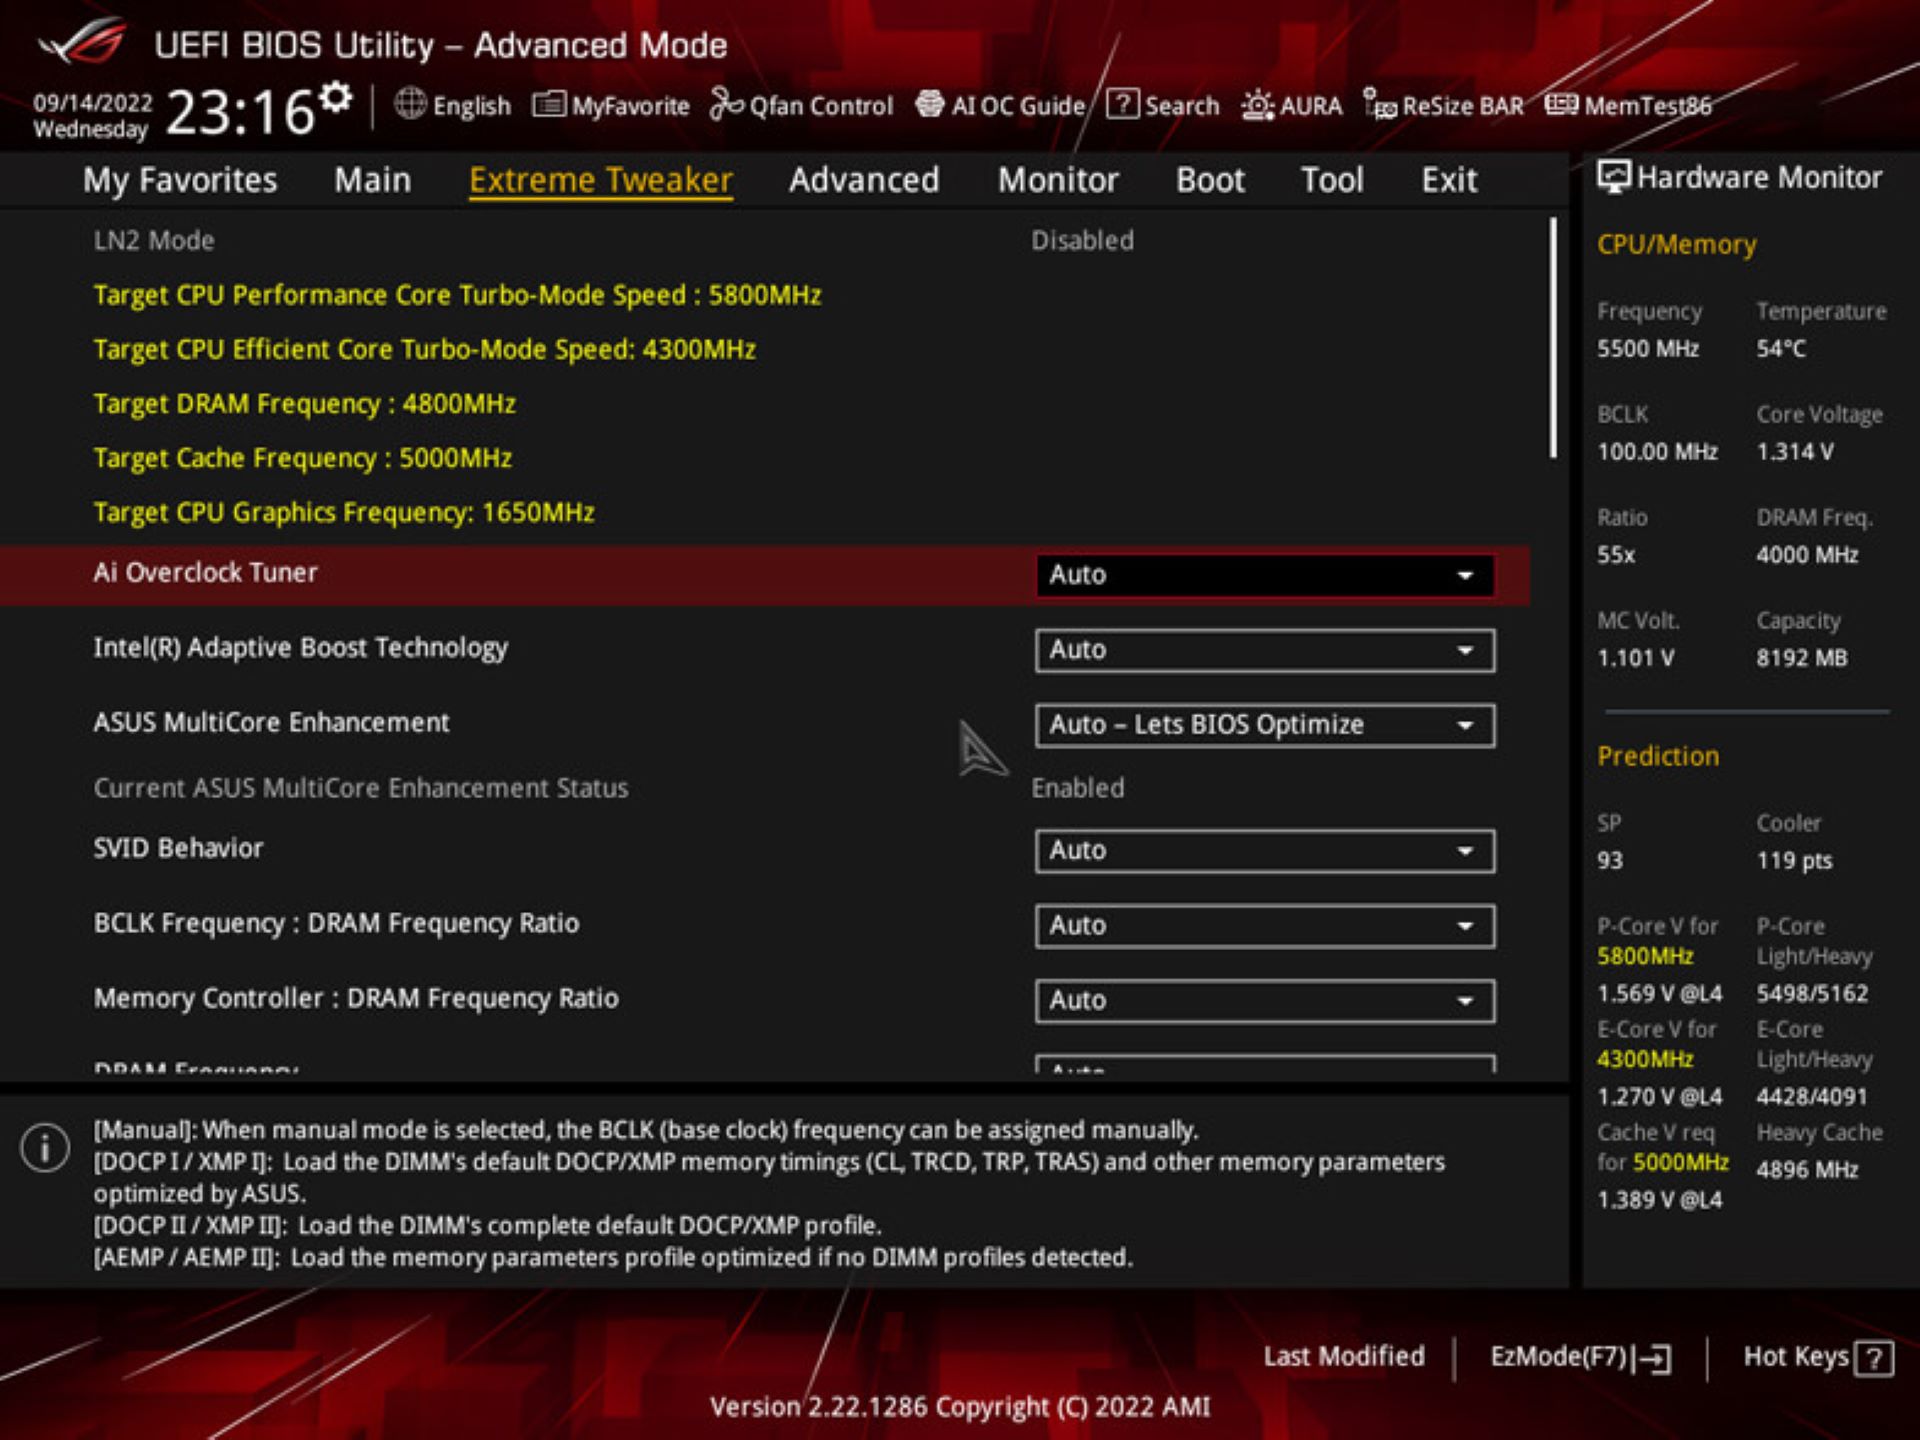
The BIOS interface for the motherboard is fairly the same as most other Maximus boards. There are two main interfaces namely Easy mode and advanced mode. Easy mode is when everything is straight to the point and miniscule in terms of functionality. Contrastingly advanced mode is for the brave of heart. Advanced mode ensures that users are given ample of parameters to adjust, change and tweak to their necessary liking.
I would say that the BIOS interface for advanced users is easy to use and understandable. However a quick warning is for those not familiar with overclocking, please do not adjust or meddle with the settings if users who have not familiarise themselves with overclocking.
What I Loved About The Z790 Apex
- White Layout
- Onboard Overclocking tools
- Accessory Package
- One of the best power stages available
- PCIE Q Release
What I Wished Was Better
- Price Tag (RM3599)
Verdict
I sincerely applaud ASUS in going with the unconventional route by ramping up the overall design scheme. Consequently, with the Z790 Apex being the ultimate overclockers motherboard, it is needless to say that all functionalities and features are of top notch selection and quality. This Apex board is certainly my preferred choice over other alternatives of the same class.
I will be releasing another follow up article on overclocking a kit of ram to it’s highest stable frequency. Be sure to catch that article as it will be published within a fortnight.
Final Score : 9/10
Product Page : https://rog.asus.com/motherboards/rog-maximus/rog-maximus-z790-apex-model/